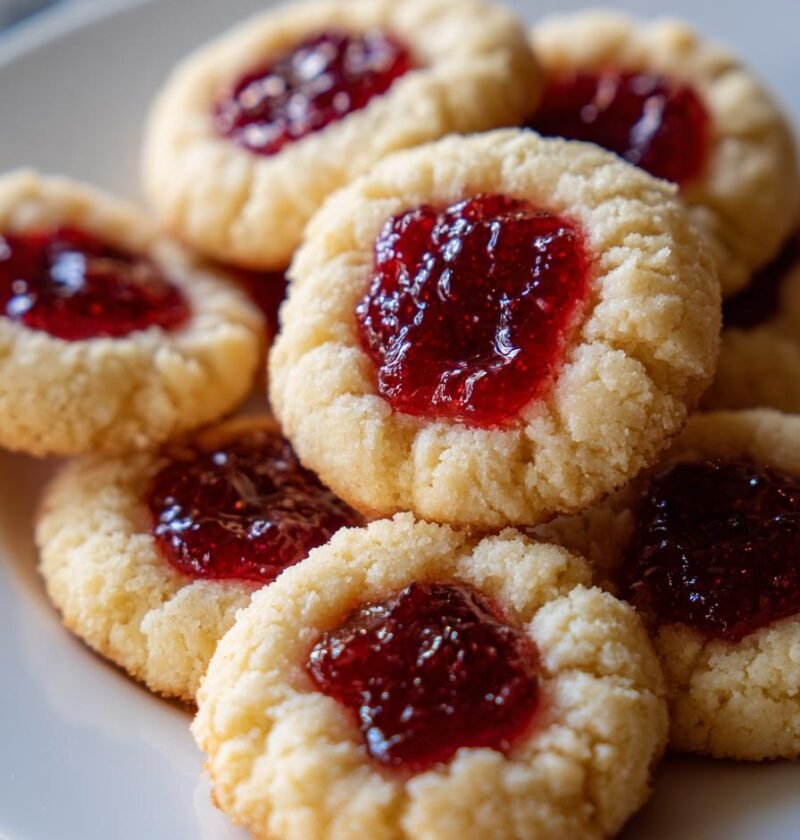
Introduction to Raspberry Thumbprint Cookies
As a busy mom, I know how precious time can be, especially when it comes to baking. That’s why I adore raspberry thumbprint cookies! These delightful treats are not only easy to whip up, but they also bring a burst of joy to any occasion. Imagine the sweet aroma of buttery cookies filling your kitchen, inviting your loved ones to gather around. Whether you’re looking for a quick solution for a busy day or a charming dessert to impress guests, these cookies are the perfect answer. Trust me, once you try them, you’ll be hooked!
Why You’ll Love This Raspberry Thumbprint Cookies
Raspberry thumbprint cookies are a delightful blend of simplicity and flavor. They come together in just 35 minutes, making them a fantastic choice for busy days. The buttery cookie base pairs perfectly with the sweet raspberry jam, creating a treat that’s hard to resist. Plus, they’re versatile! You can easily switch up the jam or add a sprinkle of nuts for a personal touch. Who wouldn’t love that?
Ingredients for Raspberry Thumbprint Cookies
Gathering the right ingredients is the first step to creating these scrumptious raspberry thumbprint cookies. Here’s what you’ll need:
- Unsalted butter: This is the star of the show! It gives the cookies their rich, buttery flavor and tender texture.
- Granulated sugar: Sweetness is key! Sugar not only sweetens the cookies but also helps them achieve that lovely golden color.
- Large eggs: Eggs bind the ingredients together and add moisture, making the cookies soft and chewy.
- Vanilla extract: A splash of vanilla enhances the flavor, adding warmth and depth to each bite.
- All-purpose flour: This is the backbone of the cookie dough, providing structure and stability.
- Salt: Just a pinch! Salt balances the sweetness and enhances the overall flavor of the cookies.
- Raspberry jam: The star filling! It adds a burst of fruity sweetness that perfectly complements the buttery cookie base.
For those looking to mix things up, feel free to experiment with different jams like strawberry or apricot. You can find all the exact measurements at the bottom of the article, ready for printing. Happy baking!
How to Make Raspberry Thumbprint Cookies
Now that we have our ingredients ready, let’s dive into the fun part—making these delightful raspberry thumbprint cookies! Follow these simple steps, and you’ll have a batch of cookies that will make your kitchen smell heavenly.
Step 1: Preheat the Oven
First things first, preheat your oven to 350°F (175°C). Preheating is crucial because it ensures that your cookies bake evenly. If you skip this step, you might end up with cookies that are too soft or burnt on the edges. Trust me, a little patience goes a long way!
Step 2: Cream Butter and Sugar
In a large bowl, cream together the softened butter and granulated sugar until the mixture is light and fluffy. This process is essential for achieving the right texture. It incorporates air into the dough, making your cookies tender and delightful. Use a hand mixer or stand mixer for the best results!
Step 3: Add Eggs and Vanilla
Next, add the eggs one at a time, mixing well after each addition. Then, stir in the vanilla extract. Eggs are the glue that holds everything together, while vanilla adds a warm, inviting flavor. You’ll notice the dough becoming richer and more aromatic!
Step 4: Combine Dry Ingredients
In a separate bowl, whisk together the all-purpose flour and salt. This step ensures that the salt is evenly distributed throughout the flour. It’s a small detail, but it makes a big difference in flavor. No one wants a salty bite in their sweet cookie!
Step 5: Mix Wet and Dry Ingredients
Gradually add the dry ingredients to the wet mixture, mixing until just combined. Be careful not to overmix! Overmixing can lead to tough cookies. You want a soft dough that holds together but isn’t overly sticky.
Step 6: Shape the Cookies
Now it’s time to shape the cookies! Roll the dough into small balls, about the size of a tablespoon. Place them on a baking sheet lined with parchment paper. Make sure to leave some space between each ball, as they will spread a little while baking.
Step 7: Create Indentations
Using your thumb or the back of a spoon, gently press down in the center of each ball to create an indentation. This is where the raspberry jam will go! Don’t press too hard; you want a nice little well without breaking the cookie.
Step 8: Fill with Raspberry Jam
Now for the fun part—filling those indentations with raspberry jam! Use a teaspoon to fill each well, but be careful not to overfill. If the jam spills over, it can create a sticky mess on your baking sheet. A little jam goes a long way!
Step 9: Bake the Cookies
Pop the baking sheet into your preheated oven and bake for 12-15 minutes. Keep an eye on them! You’ll know they’re done when the edges are lightly golden. If you want to be sure, you can gently touch the edge; it should feel firm.
Step 10: Cool and Enjoy
Once baked, allow the cookies to cool on the baking sheet for a few minutes. This helps them set before transferring them to a wire rack to cool completely. Store your raspberry thumbprint cookies in an airtight container, and they’ll stay fresh for up to a week. Enjoy every bite!
Tips for Success
- Make sure your butter is softened for easy creaming.
- Use a cookie scoop for uniform cookie sizes.
- Chill the dough for 30 minutes if it feels too sticky.
- Experiment with different jams for unique flavors.
- Keep an eye on the cookies while baking to avoid overbaking.
Equipment Needed
- Baking sheet: A standard sheet works, but a silicone mat can prevent sticking.
- Parchment paper: Great for easy cleanup; aluminum foil is a good alternative.
- Mixing bowls: Use any size, but a large bowl is best for creaming.
- Hand mixer or stand mixer: A whisk can work, but it takes more effort.
- Cookie scoop: This helps with uniform sizes; a tablespoon works too!
Variations of Raspberry Thumbprint Cookies
- Jam Variations: Swap out raspberry jam for other flavors like strawberry, apricot, or even lemon curd for a zesty twist.
- Nuts and Seeds: Add chopped nuts like almonds or walnuts to the dough for a delightful crunch.
- Gluten-Free Option: Substitute all-purpose flour with a gluten-free blend to make these cookies suitable for gluten-sensitive friends.
- Chocolate Lovers: Mix in mini chocolate chips into the dough for a rich, chocolatey flavor.
- Vegan Version: Replace butter with coconut oil and use flax eggs instead of regular eggs for a plant-based treat.
Serving Suggestions for Raspberry Thumbprint Cookies
- Pair these cookies with a warm cup of tea or coffee for a cozy afternoon treat.
- Serve them on a decorative platter for a charming dessert display at gatherings.
- Dust with powdered sugar for an elegant touch before serving.
- Enjoy with a scoop of vanilla ice cream for a delightful dessert experience.
- Include fresh raspberries on the side for a pop of color and freshness.
FAQs about Raspberry Thumbprint Cookies
As you embark on your baking adventure with raspberry thumbprint cookies, you might have a few questions. Here are some common queries I’ve encountered, along with helpful answers to guide you along the way.
Can I use frozen raspberries instead of jam?
While fresh raspberry jam is ideal, you can use frozen raspberries. Just cook them down with a bit of sugar to create a jam-like consistency. It’s a great way to enjoy the flavor of raspberries if you don’t have jam on hand!
How do I store leftover cookies?
Store your raspberry thumbprint cookies in an airtight container at room temperature. They’ll stay fresh for up to a week. If you want to keep them longer, you can freeze them for up to three months. Just make sure to separate layers with parchment paper!
Can I make the dough ahead of time?
Absolutely! You can prepare the dough in advance and refrigerate it for up to 48 hours. Just remember to let it sit at room temperature for a few minutes before rolling it into balls. This will make it easier to handle.
What can I substitute for eggs in this recipe?
If you’re looking for an egg substitute, try using a flax egg. Mix one tablespoon of ground flaxseed with three tablespoons of water and let it sit for a few minutes until it thickens. This works well in keeping the cookies moist!
Can I add chocolate to raspberry thumbprint cookies?
Definitely! If you’re a chocolate lover, consider mixing in mini chocolate chips into the dough. The combination of chocolate and raspberry is simply divine and adds a delightful twist to the classic recipe!
Final Thoughts
Making raspberry thumbprint cookies is more than just baking; it’s about creating sweet memories in your kitchen. The joy of rolling the dough, filling each cookie with luscious raspberry jam, and watching them bake to golden perfection is truly rewarding. These cookies are perfect for sharing with family and friends, bringing smiles to their faces with every bite. Whether it’s a cozy afternoon treat or a special occasion, these delightful cookies will surely become a favorite in your home. So, roll up your sleeves and let the baking adventure begin—your taste buds will thank you!
PrintRaspberry thumbprint cookies: A delightful treat recipe!

Raspberry thumbprint cookies are a delightful treat featuring a buttery cookie base filled with sweet raspberry jam, perfect for any occasion.
- Prep Time: 20 minutes
- Cook Time: 15 minutes
- Total Time: 35 minutes
- Yield: 24 cookies 1x
- Category: Dessert
- Method: Baking
- Cuisine: American
- Diet: Vegetarian
Ingredients
- 1 cup unsalted butter, softened
- 1 cup granulated sugar
- 2 large eggs
- 1 teaspoon vanilla extract
- 2 cups all-purpose flour
- 1/2 teaspoon salt
- 1 cup raspberry jam
Instructions
- Preheat the oven to 350°F (175°C).
- In a large bowl, cream together the softened butter and sugar until light and fluffy.
- Add the eggs one at a time, mixing well after each addition, then stir in the vanilla extract.
- In a separate bowl, whisk together the flour and salt.
- Gradually add the dry ingredients to the wet mixture, mixing until just combined.
- Roll the dough into small balls and place them on a baking sheet lined with parchment paper.
- Using your thumb or the back of a spoon, make an indentation in the center of each ball.
- Fill each indentation with raspberry jam.
- Bake for 12-15 minutes or until the edges are lightly golden.
- Allow to cool on the baking sheet for a few minutes before transferring to a wire rack to cool completely.
Notes
- For a variation, try using different types of jam such as strawberry or apricot.
- Store cookies in an airtight container for up to a week.
- These cookies can be frozen for up to three months.
Nutrition
- Serving Size: 1 cookie
- Calories: 120
- Sugar: 8g
- Sodium: 50mg
- Fat: 6g
- Saturated Fat: 4g
- Unsaturated Fat: 2g
- Trans Fat: 0g
- Carbohydrates: 15g
- Fiber: 0g
- Protein: 1g
- Cholesterol: 30mg