Introduction to Pink Velvet Cake
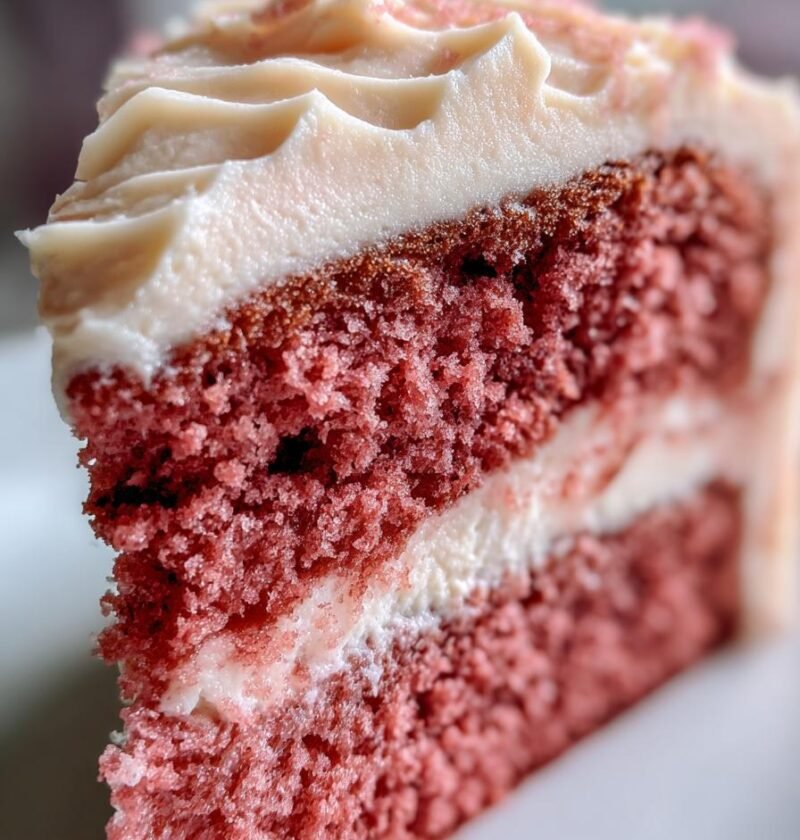
There’s something magical about a Pink Velvet Cake that instantly brightens up any occasion. As a busy mom, I know how precious time is, and this delightful cake is a quick solution for those moments when you want to impress your loved ones without spending hours in the kitchen. The rich, velvety texture combined with that charming pink hue makes it a showstopper at any celebration. Whether it’s a birthday, anniversary, or just a sweet treat for the family, this cake is sure to bring smiles and create lasting memories.
Why You’ll Love This Pink Velvet Cake
This Pink Velvet Cake is not just a feast for the eyes; it’s a breeze to make! With simple ingredients and straightforward steps, even the busiest of moms can whip it up in no time. The taste? Oh, it’s a delightful blend of sweetness and richness that will have everyone asking for seconds. Plus, its vibrant color adds a touch of joy to any gathering, making it a perfect centerpiece for your celebrations.
Ingredients for Pink Velvet Cake
Gathering the right ingredients is the first step to creating your stunning Pink Velvet Cake. Here’s what you’ll need:
- All-purpose flour: This is the backbone of your cake, providing structure and a soft crumb.
- Granulated sugar: Sweetness is key! It not only sweetens but also helps create that fluffy texture.
- Unsalted butter: Softened butter adds richness and moisture, making your cake melt-in-your-mouth delicious.
- Buttermilk: This ingredient gives the cake a tender crumb and a slight tang that balances the sweetness.
- Large eggs: Eggs bind everything together and contribute to the cake’s lovely rise.
- Vanilla extract: A splash of vanilla enhances the flavor, making every bite more delightful.
- Cocoa powder: Just a hint of cocoa adds depth without overpowering the pink hue.
- Baking soda: This leavening agent helps the cake rise, ensuring it’s light and fluffy.
- Salt: A pinch of salt balances the sweetness and enhances the overall flavor.
- Red food coloring: The star of the show! This gives the cake its signature pink color. Make sure to mix it well for an even hue.
For those looking to switch things up, consider using cake flour for an even lighter texture or Greek yogurt instead of buttermilk for a healthier twist. You can find all the exact measurements at the bottom of the article, ready for printing!
How to Make Pink Velvet Cake
Now that you have all your ingredients ready, let’s dive into the fun part—making your Pink Velvet Cake! Follow these simple steps, and you’ll have a beautiful cake that’s sure to impress.
Step 1: Preheat and Prepare
First things first, preheat your oven to 350°F (175°C). This ensures your cake bakes evenly. While the oven warms up, grease two 9-inch round cake pans. I like to use a bit of butter or cooking spray to make sure the cakes come out easily. You can also line the bottoms with parchment paper for extra insurance!
Step 2: Cream Butter and Sugar
In a large mixing bowl, cream together the softened unsalted butter and granulated sugar. Use an electric mixer on medium speed until the mixture is light and fluffy. This usually takes about 3-5 minutes. The fluffiness is key to a tender cake, so don’t rush this step!
Step 3: Add Eggs and Wet Ingredients
Next, add the eggs one at a time, mixing well after each addition. This helps incorporate air, giving your cake a lovely rise. Then, stir in the buttermilk and vanilla extract. The buttermilk adds moisture and a slight tang, balancing the sweetness beautifully.
Step 4: Mix Dry Ingredients
In a separate bowl, whisk together the all-purpose flour, cocoa powder, baking soda, and salt. This step is crucial! It ensures that the leavening agent is evenly distributed throughout the flour, which helps your cake rise perfectly.
Step 5: Combine Mixtures
Now, gradually add the dry ingredients to the wet mixture. Mix until just combined. Be careful not to overmix; a few lumps are okay! Overmixing can lead to a dense cake, and we want that light, airy texture.
Step 6: Add Food Coloring
Here comes the fun part! Stir in the red food coloring until the batter is evenly colored. Make sure to mix it well, so you don’t end up with streaks of color. The vibrant pink hue is what makes this cake so special!
Step 7: Bake the Cakes
Divide the batter evenly between the prepared cake pans. Bake in your preheated oven for 25-30 minutes. To check for doneness, insert a toothpick into the center of the cakes. If it comes out clean or with a few crumbs, they’re ready!
Step 8: Cool the Cakes
Once baked, allow the cakes to cool in the pans for about 10 minutes. Then, carefully transfer them to a wire rack to cool completely. This step is important because frosting a warm cake can lead to a melty mess. Patience is key here!
Tips for Success
- Always measure your ingredients accurately for the best results.
- Use room temperature ingredients for a smoother batter.
- Don’t skip the cooling time; it prevents frosting disasters!
- For a richer flavor, consider adding a cream cheese frosting.
- Experiment with different food coloring brands for vibrant results.
Equipment Needed
- Two 9-inch round cake pans (or one 9×13-inch pan for a single layer)
- Mixing bowls (a large one for wet ingredients and a medium one for dry)
- Electric mixer (a whisk works too, but it’ll take longer)
- Measuring cups and spoons for accuracy
- Cooling rack (a plate can work in a pinch)
Variations of Pink Velvet Cake
- Chocolate Pink Velvet Cake: Add a bit more cocoa powder for a chocolatey twist that pairs beautifully with the pink hue.
- Red Velvet Cake: Swap the pink food coloring for red for a classic red velvet version, perfect for Valentine’s Day!
- Gluten-Free Option: Use a gluten-free all-purpose flour blend to make this cake suitable for those with gluten sensitivities.
- Vegan Pink Velvet Cake: Substitute eggs with flaxseed meal and use plant-based butter and buttermilk for a vegan-friendly version.
- Fruit-Infused Cake: Add pureed strawberries or raspberries to the batter for a fruity flavor that complements the cake’s sweetness.
Serving Suggestions for Pink Velvet Cake
- Pair with a dollop of whipped cream for a light and airy contrast.
- Serve alongside fresh berries for a pop of color and flavor.
- Complement with a glass of cold milk or a cup of coffee.
- Garnish with edible flowers for an elegant touch.
- Present on a beautiful cake stand to showcase its stunning color.
FAQs about Pink Velvet Cake
As you embark on your Pink Velvet Cake journey, you might have a few questions. Here are some common queries I’ve encountered, along with helpful answers to guide you along the way.
Can I use a different type of food coloring?
Absolutely! While red food coloring is traditional, you can experiment with gel or natural food coloring for a unique twist. Just remember that the amount needed may vary, so start with a little and add more until you achieve your desired shade.
How do I store leftover Pink Velvet Cake?
To keep your cake fresh, store it in an airtight container at room temperature for up to three days. If you have leftover frosted cake, refrigerate it to maintain its flavor and texture. Just be sure to let it come to room temperature before serving!
Can I make this cake ahead of time?
Yes! You can bake the cakes a day in advance. Just wrap them tightly in plastic wrap and store them in the refrigerator. This not only saves time but also allows the flavors to meld beautifully.
What frosting pairs well with Pink Velvet Cake?
While cream cheese frosting is a popular choice, you can also try vanilla buttercream or even a light whipped cream. Each option adds a delightful contrast to the cake’s sweetness and enhances its overall charm.
Can I make this cake gluten-free?
Definitely! Simply substitute the all-purpose flour with a gluten-free flour blend. Just ensure that the blend contains xanthan gum for the best texture. Your guests won’t even know the difference!
Final Thoughts
Making a Pink Velvet Cake is more than just baking; it’s about creating moments of joy and connection. Each slice brings a smile, whether it’s a birthday celebration or a simple family dinner. I love how this cake transforms an ordinary day into something special with its vibrant color and delightful flavor. Plus, it’s a recipe that invites creativity, allowing you to experiment with flavors and decorations. So, gather your loved ones, whip up this charming cake, and let the laughter and sweet memories unfold. Trust me, it’s a treat that will linger in your hearts long after the last crumb is gone!
PrintPink velvet cake: Discover the secret to its charm!
A delightful and visually stunning pink velvet cake that combines the richness of traditional velvet cake with a charming pink hue, perfect for any celebration.
- Prep Time: 20 minutes
- Cook Time: 30 minutes
- Total Time: 50 minutes
- Yield: 12 servings 1x
- Category: Dessert
- Method: Baking
- Cuisine: American
- Diet: Vegetarian
Ingredients
- 2 1/2 cups all-purpose flour
- 1 1/2 cups granulated sugar
- 1 cup unsalted butter, softened
- 1 cup buttermilk
- 3 large eggs
- 1 tablespoon vanilla extract
- 1 tablespoon cocoa powder
- 1 teaspoon baking soda
- 1 teaspoon salt
- 1 tablespoon red food coloring
Instructions
- Preheat the oven to 350°F (175°C) and grease two 9-inch round cake pans.
- In a large bowl, cream together the butter and sugar until light and fluffy.
- Add the eggs one at a time, mixing well after each addition.
- Stir in the buttermilk and vanilla extract.
- In a separate bowl, whisk together the flour, cocoa powder, baking soda, and salt.
- Gradually add the dry ingredients to the wet mixture, mixing until just combined.
- Stir in the red food coloring until the batter is evenly colored.
- Divide the batter evenly between the prepared cake pans.
- Bake for 25-30 minutes or until a toothpick inserted into the center comes out clean.
- Allow the cakes to cool in the pans for 10 minutes before transferring to a wire rack to cool completely.
Notes
- For a richer flavor, consider adding a cream cheese frosting.
- Ensure the food coloring is evenly mixed for a consistent pink color.
- This cake can be made a day in advance and stored in the refrigerator.
Nutrition
- Serving Size: 1 slice
- Calories: 350
- Sugar: 25g
- Sodium: 200mg
- Fat: 15g
- Saturated Fat: 9g
- Unsaturated Fat: 4g
- Trans Fat: 0g
- Carbohydrates: 50g
- Fiber: 1g
- Protein: 4g
- Cholesterol: 60mg